I’ve been working quite a bit on getting enough materials in hand for both the DIY and Production editions of WaveBoy and this has caused the firmware to take a bit of a back seat. I recently started working on a number of things for the next firmware release (0.58) and thought I might go through some of these. Of note there isn’t any guarantees all of these might make it in though that is generally the plan.
Streaming Samples
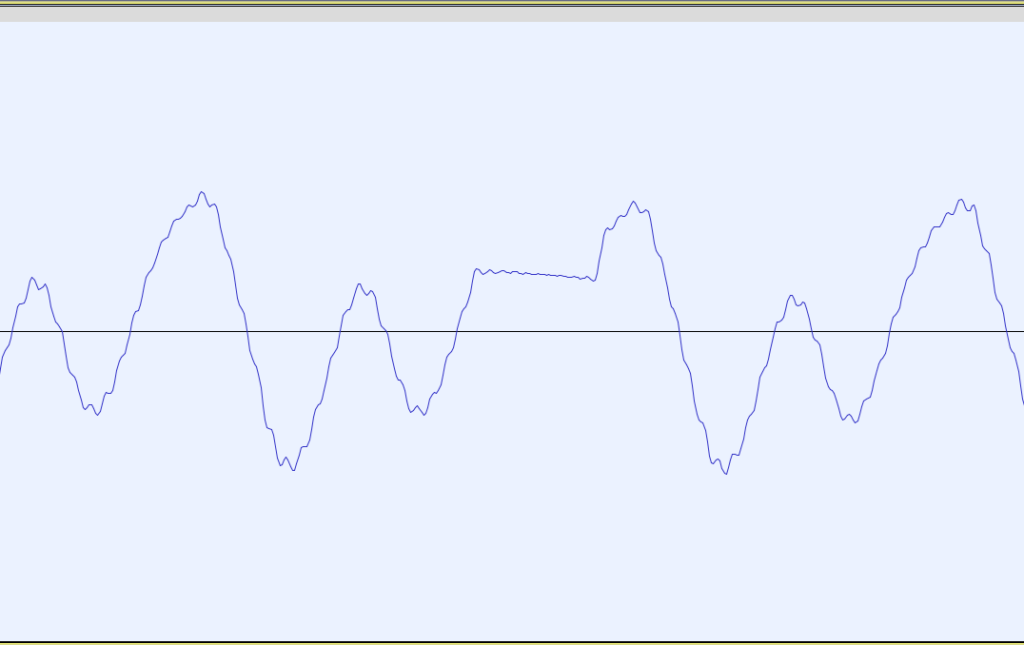
Something I have been wanting to work on for quite some time is to see if I can stream samples directly off the SD card in “realtime.” I recently gave this a go, initially using a naive implementation. This worked most of the time, but not all of the time. This is because reading just a few bytes off the SD card is usually fast, but when it’s not, it’s slow enough to where updates to the DAC get missed and this causes artifacts.
You can see in the above that weird slope in the middle. That’s not supposed to be there. The beauty of the simple solution is that loops were easy to manage. But it’s not really a solution if it doesn’t sound and work the way I want. Another limitation was the sample rate could not go as high as with the previous solution.
So plan B has been to use a simple set of 512-byte buffers where one is being read while the other is being written. This seems to work very very well. Not only can I play files of several megabytes in size without any discernible artifacts, I can also support higher pitches similar to the original solution. All while taking up far far less SRAM (which is fairly precious).
The one big issue at present is looping is now more difficult to implement, but certainly doable. The looping will end up being moved to the buffer routine such that the read-routine that sends data to the DAC can remain simple. I not sure if 0.58 will have looping functions or not. That would be a regression from how things are today but only until I sort out how to do at least forward loops.
LFOs
My band-mate has been wanting more modulation options for his guitar-centric Eurorack. While he’s been trying to figure out what LFOs to get, I realized it wouldn’t take too much work to setup an LFO mode on the Step output and would like to have at least a basic LFO in 0.58 (even if it’s just a triangle).
Envelope Follower and Realtime Bitcrushing
Another thing my band-mate’s been trying to sort out is an envelope follower. Specifically an asymetric one (where the up and down slopes can be independent). This, I think, is doable by using the CV input (since it’s bipolar) as a sample source and then output the enveloped on the Step out (which at some point I’ll probably rename to simply “Aux” or something similar).
But if I can do that, I can also do realtime bitcrushing. I find the Sampler’s crunch is really fun and the variable rate DAC seems like a great solution for adding an interesting flavor of bit-crush and sample reduction. As with the follower, the audio would be sampled via the CV in, mangled, and then sent out probably the main audio out.
What’s Not Making It
Folks may notice something glaring lacking from this release. The Generators feature, which allows for generating full Wave patches (all 16 frames) using Manipulators and/or algorithms. This is coming! But the above features I thought were a bit more in reach and I really wanted to improve the sampler. Yes, this is partly selfish since I tend to use one of my own WaveBoy’s as a sampler to augment drums among other things. The 12-bit variable clocked DAC gives it a nice LinnDrum-like sound that I really like.
Also a sequencer/tracker is something I’d like to do. The Sampler updates help realize this by freeing up more RAM for things like pattern storage. Of note this is not a near term feature necessarily (in part due to needing to figure out how to work with the limited size of the display as well as its overhead in updating the display).
I’m not sure when 0.58 will come out but I’m actively working it! That’s all for now! Of note both the DIY and Production versions of WaveBoy are now available for purchase if you want to pick one up!
For now, Happy Synthing!
Tim